Creating database schema
Firstly, a database schema is needed for storing Sonar diagnostics:1. Download Oracle XE database.
2. Install database.
3. Connect as sys user and create an user for Sonar application.
4. Grant all privileges to this user.
NOTE: Sonar will not execute correctly if there are two SonarQube schemas in the same database instance.
Installing SonarQube
Once database is configured, the Sonar installation can be started:1. Download SonarQube.
2. Check the requirements, basically it does not work with JDK 6 or below.
3. Unzip the package to a directory of your choice.
4. Edit the file \conf\sonar.properties, setting the following parameters:
#Database user for Sonar:
sonar.jdbc.username=sonarqube
sonar.jdbc.password= <DB_password>
#Database connection URL:
sonar.jdbc.url=jdbc:oracle:thin:@localhost:1521/XE
#Local host and port:
sonar.web.host=localhost
sonar.web.port=9000
#Context root:
sonar.web.context=/sonar
5. As Oracle database is used, the OJDBC driver must be downloaded.
6. Copy the "ojdbc6.jar" file to the \extensions\jdbc-driver\oracle folder.
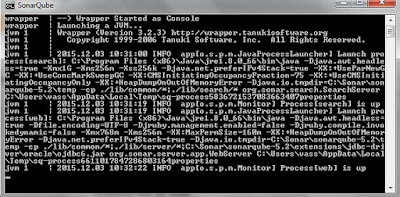
7. Run the "StartSonar.bat" file (Windows), located under the bin directory.
8. The properties are loaded and a message will notify that the process is up.
NOTE: If java version error is prompted, ensure a compatible Java installation is set in the JAVA_HOME environment variable.
9. Check the installation by opening a browser and introducing Sonar URL:
http://127.0.0.1:9000/
Installig SonarQube Scanner
SonarQube requires a launcher and SonarQube Scanner is the recommended one.1. Download SonarQube Scanner launcher.
2. Uncompress the package in a folder of your choice.
3. Edit the \conf\sonar-runner.properties file.
#Default SonarQube server
sonar.host.url=http://localhost:9000
sonar.jdbc.url=jdbc:postgresql://localhost/sonar
#Database settings:
sonar.jdbc.url=jdbc:oracle:thin:@localhost:1521/XE
sonar.jdbc.username=sonarqube
sonar.jdbc.password=<DB_password>
#Sonar credentials (by default admin/admin):
sonar.login=admin
sonar.password=admin
NOTE: It is important to assign the same port and context that were configured previously in the sonar.properties file.
4. Add to the 'path' environment variable the location of Scanner bin directory. Ex: C:\Sonar\sonar-runner-2.4\bin
5. Check the installation by opening a command window and running sonar-runner.bat
Analysing code
In order to analyse the code, the following steps must be performed:1. Navigate to your WebCenter application folder. Ex: C:\JDeveloper\mywork\CoherenceApp
2. Create a file named "sonar-project.properties".
3. Edit the file using this template and updating the values:
# must be unique in a given SonarQube instance
sonar.projectKey=CoherenceApp
# this is the name displayed in the SonarQube UI
sonar.projectName=CoherenceApp
sonar.projectVersion=1.0
# Path is relative to the sonar-project.properties file. Replace "\" by "/" on Windows.
# Since SonarQube 4.2, this property is optional if sonar.modules is set.
# If not set, SonarQube starts looking for source code from the directory containing
# the sonar-project.properties file.
sonar.sources=.
# Encoding of the source code. Default is default system encoding
#sonar.sourceEncoding=UTF-8
4. After saving the changes, open a command window and navigate to the directory of the application where the file was created.
5. Execute the command 'sonar-runner'.
6. Open the Sonar URL and login as administrator user.
7. The new project would appear in the Project dashboard.
8. Click on the project link and check the issues, which are classified depending on the severity.
9. Repeat the previous steps for all the WebCenter applications that you wish to analyse.
NOTE: In my case, I found problems with Serializable and Log errors, Sonar marked this type of errors although the code was perfectly compliant.
References
Oracle Database 11g Release 2 JDBC Drivers
Oracle XE Download page
Sonar
SonarQube Download page
SonarQube Installing the server
SonarQube Requirements
SonarQube Scanner Installing and configuring


No comments:
Post a Comment