Showing posts with label Oracle WebCenter. Show all posts

Friday, 4 December 2015

Managing WebCenter quality code with Sonar

Ensuring the quality of the code in Oracle WebCenter implementations is a requirement by some clients and a recommendation for project managers. The most widely used tool for managing quality code is Sonar, an open source software that meets most of the requirements. In this post the process of integrating WebCenter application with Sonar is briefly explained.

Creating database schema 

Firstly, a database schema is needed for storing Sonar diagnostics:

1. Download Oracle XE database.
2. Install database.
3. Connect as sys user and create an user for Sonar application.
4. Grant all privileges to this user.
NOTE: Sonar will not execute correctly if there are two SonarQube schemas in the same database instance.

Installing SonarQube

Once database is configured, the Sonar installation can be started:

1. Download SonarQube.
2. Check the requirements, basically it does not work with JDK 6 or below.
3. Unzip the package to a directory of your choice.
4. Edit the file \conf\sonar.properties, setting the following parameters:

#Database user for Sonar:
sonar.jdbc.username=sonarqube
sonar.jdbc.password= <DB_password>

#Database connection URL:
sonar.jdbc.url=jdbc:oracle:thin:@localhost:1521/XE
#Local host and port:
sonar.web.host=localhost
sonar.web.port=9000
#Context root: 
sonar.web.context=/sonar


5. As Oracle database is used, the OJDBC driver must be downloaded.
6. Copy the "ojdbc6.jar" file to the \extensions\jdbc-driver\oracle folder.
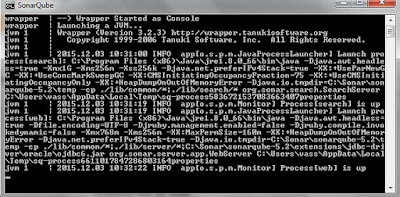
7. Run the "StartSonar.bat" file (Windows), located under the bin directory.
8. The properties are loaded and a message will notify that the process is up.


NOTE: If java version error is prompted, ensure a compatible Java installation is set in the JAVA_HOME environment variable.
9. Check the installation by opening a browser and introducing Sonar URL:
http://127.0.0.1:9000/ 

Installig SonarQube Scanner

SonarQube requires a launcher and SonarQube Scanner is the recommended one.

1. Download SonarQube Scanner launcher.
2. Uncompress the package in a folder of your choice.
3. Edit the \conf\sonar-runner.properties file.

#Default SonarQube server
sonar.host.url=http://localhost:9000

sonar.jdbc.url=jdbc:postgresql://localhost/sonar
#Database settings:
sonar.jdbc.url=jdbc:oracle:thin:@localhost:1521/XE
sonar.jdbc.username=sonarqube
sonar.jdbc.password=<DB_password>

#Sonar credentials (by default admin/admin):
sonar.login=admin
sonar.password=admin


NOTE: It is important to assign the same port and context that were configured previously in the sonar.properties file.
4. Add to the 'path' environment variable the location of Scanner bin directory. Ex: C:\Sonar\sonar-runner-2.4\bin
5. Check the installation by opening a command window and running sonar-runner.bat

Analysing code

In order to analyse the code, the following steps must be performed:

1. Navigate to your WebCenter application folder. Ex: C:\JDeveloper\mywork\CoherenceApp
2. Create a file named "sonar-project.properties".
3. Edit the file using this template and updating the values:

# must be unique in a given SonarQube instance
sonar.projectKey=CoherenceApp
# this is the name displayed in the SonarQube UI
sonar.projectName=CoherenceApp
sonar.projectVersion=1.0

# Path is relative to the sonar-project.properties file. Replace "\" by "/" on Windows.
# Since SonarQube 4.2, this property is optional if sonar.modules is set.
# If not set, SonarQube starts looking for source code from the directory containing
# the sonar-project.properties file.
sonar.sources=.

# Encoding of the source code. Default is default system encoding
#sonar.sourceEncoding=UTF-8


4. After saving the changes, open a command window and navigate to the directory of the application where the file was created.
5. Execute the command 'sonar-runner'.

6. Open the Sonar URL and login as administrator user.
7. The new project would appear in the Project dashboard.

8. Click on the project link and check the issues, which are classified depending on the severity.

9. Repeat the previous steps for all the WebCenter applications that you wish to analyse.

NOTE: In my case, I found problems with Serializable and Log errors, Sonar marked this type of errors although the code was perfectly compliant.


References


Oracle Database 11g Release 2 JDBC Drivers
Oracle XE Download page
Sonar
SonarQube Download page
SonarQube Installing the server
SonarQube Requirements
SonarQube Scanner Installing and configuring
Tuesday, 22 September 2015

Tracking web services calls in WebCenter logs

When invoking web services from WebCenter applications, it may be useful to track all the requests and responses generated in the application. In order to achieve this, some configuration in WebLogic console must be done:

1. Log in to WebLogic console as administrator user.

2. Navigate to WebCenter Portal managed server.

3. Select Configuration -> Server Start tab.


4. In the Arguments box, paste the following commands:


  -Dcom.sun.xml.ws.transport.http.client.HttpTransportPipe.dump=true  -Dweblogic.security.SSL.verbose=true -Dcom.sun.net.ssl.checkRevocation=false


5. Save and restart the managed server.

After that, in the out log file there will be traces with all the requests to web services, as well as their responses.

For instance:

---[HTTP request - http://<WS_Host>:6073/Service/CustomerManagement/Endpoint]---
Content-type: text/xml; charset=utf-8
Soapaction: "/Service/CustomerManagement.serviceagent/CustomerManagementEndpoint/GetServiceBillingAccounts"
Accept: text/xml, multipart/related, text/html, image/gif, image/jpeg, *; q=.2, */*; q=.2
<?xml version='1.0' encoding='UTF-8'?>


[..]

---[HTTP response - http://<WS_Host>:6073/Service/CustomerManagement/Endpoint - 200]---
null: HTTP/1.1 200 OK
Content-type: text/xml; charset="utf-8"
Content-length: 32026
Connection: keep-alive
Server: Jakarta-HttpComponents-NIO/1.1
Date: Thu, 17 Sep 2015 17:44:42 GMT
<?xml version="1.0" encoding="UTF-8"?>


It is important to note that this configuration is not recommended in Production environments, as it negatively affects the performance of the WebCenter platform.

Acknowledgement: Thanks to Roberto Fuertes Peña for his help.

Tuesday, 12 May 2015

Forcing maintenance page in WebCenter

When a WebCenter environment requires a shutdown or a restart, it is advisable to present a friendly error page instead of the traditional "Failure of server Apache bridge". This can be easily achieved by implementing a static html page and configuring OHS. This can be applied to other applications too.

The maintenance page could have a html structure similar to the web template, or it could just be an image with a friendly message. For example, maintenance.html could be defined as follows:


<!doctype html>
<html>
<head>
<meta charset="utf-8">
<meta http-equiv="X-UA-Compatible" content="IE=edge">
</head>
<body>
    <div>
        <img src="/Static/ClientPages/img/Maintenance.jpg">                   
    </div>   
</body>
</html>

Once page is uploaded to the server, some code must be inserted inside the OHS virtual host element in the configuration file (mod_wl_ohs.conf). For instance, the following code redirect all the OHS requests to the plain maintenance page.


RewriteEngine On

RewriteCond %{SCRIPT_FILENAME} !/Static/ClientPages/*

RewriteRule ^.*$ /Static/ClientPages/maintenance.html [R=503,L]
Header Set Cache-Control "max-age=0, no-store"

After that, OHS instance needs to be restarted using the opmnctl command.

Also, it is interesting to set error pages to different HTTP status codes. The following lines force the display of error and maintenance pages depending on the type of errror: Internal server error (500) or Service unavailable (503).

ErrorDocument 500 /Static/ClientPages/error.html

ErrorDocument 503 /Static/ClientPages/maintenance.html

Other options are:

  • IP exceptions: It is possible to set IP exceptions to the redirect operation, that could be developers' addresses.
           RewriteCond %{REMOTE_ADDR} !^123\.456\.789\.000
  • Checking first if the maintenance page exists.
           RewriteCond /Static/ClientPages/maintenance.html -f
  • External switch to enable and disable maintenance: OHS redirects to maintenance pages if a file exists.
           RewriteCond /Static/ClientPages/maintenance.enable -f

These options are well explained in this post.

References:

Redirect Site to Maintenance Page using Apache and HTAccess
Setting a WebCenter Maintenance Page
HTTP status codes
Apache mod_rewrite

Tuesday, 7 April 2015

Integrating OAM 11g with Google Authentication


Nowadays most of the people have multiple internet accounts, each of them with their own credentials, so we usually struggle to remember which user and password were used for a website. Also, web administrators realised many users refuse to register in their sites because they do not want to go through the process of entering all the required data and having another credential to remember.

To avoid this problem, web applications started to de integrated with social media APIs. This way, registration process is easier and login just takes a couple of clicks, making more attractive the site to users.

In the case of Oracle WebCenter Portal, authentication is usually managed in Oracle Access Manager (OAM) and this product can be integrated with social login. In this post I am going to focus on the integration with Google authentication.

When I started this integration with my colleague Sara Manzanero, we found this post and this one explaining the process, which seemed quite straight forward. However, they were written when Google used the OpenID protocol, and now it is using the OAuth 2.0 protocol; also there were some missed steps.

1. Configuring web server

Web server needs to be configured for the roots "oic_rest" and oic_rp". The following fragment is an example for OHS:

# Social Login
<Location /oic_rest>
      SetHandler weblogic-handler
      WeblogicCluster <ip1>:<oam1_port>,<ip2>:<oam_port2>
      Satisfy any
      Allow from all
</Location>
<Location /oic_rp>
      SetHandler weblogic-handler
      WeblogicCluster <ip1>:<oam1_port>,<ip2>:<oam_port2>
      Satisfy any
      Allow from all   
</Location>

2. Enabling Mobile and Social

In order to enable social login in OAM, perform the following actions:

1. Login to OAM console.

2. Navigate to Configuration -> Available Services.

3. Enable "Identity Federation" and "Mobile and Social" services.


3. Creating user identity store

1. In OAM console, navigate to User Identity Stores.

2. Create a new IDS Repository with the connection data to the client identity store (LDAP, AD, ....).


 3. Create an IDS Profile pointing to the IDS repository created in the previous step.


4. Set the new profile as the Default  Store and save changes.


 4. Editing Mobile Services

1. Navigate to Mobile and Social > Mobile Services.

2. Edit UserProfile in Service Providers table.


3. Set the Identity Directory Service to the one created in the previous section.


5. Creating Google Project

A Google project must be created using our own account:

1. Login to Google developer console:

2. Create a new project:


3. Once created, navigate to Credentials and createa new client ID. 


4. Set your website URL and for "Redirect URIs", specify this:
http://<host>:<ohs_port>/oic_rp/return

5. Eventually, the Client ID and secret will be displayed for this project:


6. Copy those  values for later use.

6. Editing Internet Identity Provider

1. Back to OAM console, navigate to Social Identity.

2. In Internet Identity Providers section, edit Google.


IMPORTANT: In order to use the Google Identity Provider with OAuth 2.0, the following patch must be applied: 
- Patch 18955121: GOOGLE OPENID INTERFACE NOT ANYMORE SUPPORTED BY GOOGLE
Or simply upgrade OAM to 11.1.2.2.4 with BP04:
- Patch 19718347: ORACLE IDENTITY MANAGEMENT SUITE BUNDLE PATCH 11.1.2.2.4
After patching, providers must be updated with the WLST instruction msUpgrade().

3. Paste the Consumer key and secret from your Google project.


4. Save changes.

7. Configuring User Identity Store

1. Navigate to User Identity Store screen and edit the IDS Profile created in section 3.


2. In the Entity Attributes tab,  there is a table with the mappings of the identity store.


3.  Ensure the attributes needed are defined and properly mapped, such as cn, userPassword or mail.

4. Click on the Entities tab and edit the attribute values, they should be provided by the Identity store (LDAP, AD) administrator team.


5. Save changes.

NOTE: If the following error is prompted at saving changes, check that all the attributes have Name, Field and Description.


8. Editing Application Profile

1. Navigate to the Social Identity screen and edit the application profile is being used.


2.  Set the attribute values according to your needs. It is important to choose the UserID Attribute to the Entity Attribute that will be checked when users log in with Google (previous task). For Shared Secret, choose a password of yor choice.


3. Create the Application User Attributes needed for the login and map them to the registration names. The A-Team has a good post explaining this process.


4. In the last section of the page, select Google and define the mappings between the Identity provider (Google) and application.


5. Save changes.

9. Updating Authentication Scheme

1. Navigate to Authentication Schemes and select OICScheme.

2. Set Challenge URL to the /oic_rp/login.jsp path, including host and port. Also, include the parameter MatchLDAPAttribute to the attribute that will uniquely identify users in the identity store, this is configured in section 7.


3. Save changes.

10. Configuring Application Domain

1. Finally, navigate to Application Domains and select the one is being used (OAMApplication) or create a new one if it is a new installation. 

NOTE: The name of the application domain must match the name of the Application Profile (section 8).

2. Click on the Authentication Policies tab.


3. Click on the Protected Resource Policy and set the Authentication Scheme to OICScheme.


4. Save changes and configuration is finished.

Checking Google Login

Once all the configuration steps have be implemented, it is time to test the functionality.

1. Enter the URL to a protected resource of your application and the following screen will be displayed.


2. Click on the Google icon and you will have to login with Google (if you are not already logged in) and confirm the application can access your Google account.


3. the registry page will be loaded with some of the fields already filled in from your Google account.


NOTE: The above screen is the default one, taken from documentation, the displayed attributes do not correspond to the configuration described in this post.

4. After filling all the required information, click Register and the user should be created in the identity store.

5. The next time that I want to access the application, I would simply click the Google link in the login page and I will be logged in directly.

In a future post I will explain how to use customised WebCenter Portal pages for registy and login.

References

SR 3-10408828701 : OAM Integration with Facebook Invalid OAuth access token value