Enriching the client's identity: Customer Identity and Access Management (Spanish)
Thursday, 24 November 2016
Enriching the client's identity: Customer Identity and Access Management
Monday, 4 January 2016
Creating a new site in WebCenter Sites
This post describes briefly how to create a new site in WebCenter Sites, including users and roles creation.
1. Create users:


2. Create Site:

3. Enable Asset Types: The new site needs asset types.


4. Create Roles:


5. Add users and roles to the site:


6. Grant site permissions to the new roles.



7. Testing the new site permissions:

After performing these actions, developers can start to create the elements of the new site in WebCenter Sites. The permissions of the different groups of users should be adjusted during development process to meet the needs of the team.
1. Create users:
- Login to WC Sites Console as administrator.
- Navigate to Admin tab, User Access Management, User.

- Enter the name of the user to be created and select the "Add user option".
- Click OK.
- In the next screen, select the Access privileges (ACLs) and password. In this case, the users are going to be contributors, so they will have the following ACLs: Browser, ElementEditor, ElementReader, PageEditor, PageReader, UserReader, Visitor, VisitorAdmin, xceleditor

- Click Add and repeat the process for all the users to be created.
2. Create Site:
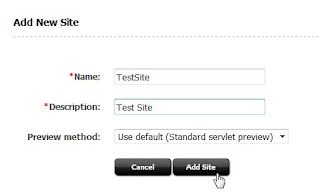
- In the Admin tab, navigate to Sites, Add New.

- Enter Name and Description and accept the default preview method.

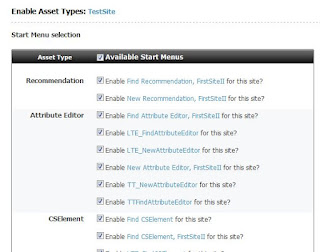
3. Enable Asset Types: The new site needs asset types.
- In Sites, navigate to the new site, Asset Types and click Enable.

- In this screen select all the asset types that are going to be used in this site. For example: Recommendation, Attribute Editor, CSElement, Collection, Device, Device Group, Dimension, DimensionSet, History Attribute, History Definition, Link, Page, Page Attribute, Page Definition, Page Filter, Promotion, Query, Visitor Attribute, Segment, SiteEntry, Site Plan, Template, WebRoot.

- Click on Enable assets
- Select "Available Start Menus" and then "Enable Asset Types".

4. Create Roles:
- Navigate to Admin, User Access Management, Roles.

- Click on Add New.
- Enter Name and description for the role.

- Click "Add New Role" button.
- Repeat the process for other roles that might be needed for this site.
5. Add users and roles to the site:
- Navigate to Sites and expand the recently created site.
- Click on Users and enter the name of the user to be added.

- Click on the Edit icon for the user.

- Select the roles that the user will have in this site and save changes. For example: AdvancedUser, SiteAdmin, SitesUser, TestContributor.

- Repeat for other users.
6. Grant site permissions to the new roles.
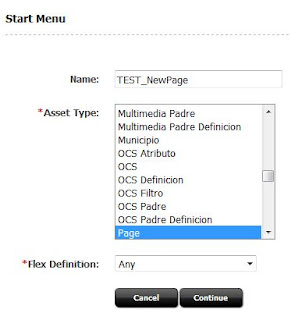
- Navigate to Start Menu, Add New.

- Enter a Name and select the asset type permission that is going to be granted to the role. In this case, it is going to be a New Page grant.

- Select the Type (New), the new site and the role that will have permissions for this action.


- Save and repeat the action for other operations, typically this task is performed for pages, page attributes and page definitions; each of them with grants for New and Search actions (Type selector).
7. Testing the new site permissions:
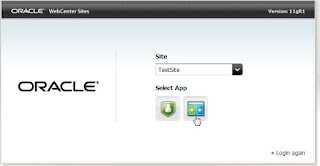
- Login as one of the new users.
- Select the new site from the selection list and click in the Contributor icon.

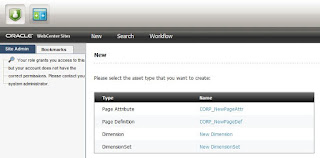
- In the Content tab, select New and the list of objects that can be created in Contribution mode is displayed.

- Click on the Admin icon in the top hand left corner of the screen.
- The list of Admin components is shown.

After performing these actions, developers can start to create the elements of the new site in WebCenter Sites. The permissions of the different groups of users should be adjusted during development process to meet the needs of the team.
References
Subscribe to:
Comments (Atom)